
Every Tales of Eternia artes family by character: Reid, Farah, Keele, Meredy, Chat and Max, with TP costs, unlock conditions, combo routing and Mystic Artes.
Tales of Eternia Artes List and Combo Guide
Six characters, three completely different arte systems, and not a single one of them shares a progression rule with the others. Reid and Farah learn by levelling hidden Slash/Thrust and Punch/Kick counters that the game never displays. Keele and Meredy learn nothing from combat at all, because what they can cast is decided by where you drop each Greater Craymel inside the Craymel Cage. Chat and Max only learn by walking to a specific place and triggering an event. Every TP cost and unlock condition on this page is original-release data (the 2000 PlayStation release, as catalogued by the PlayStation-era shrine guides), because Bandai Namco has published no arte table for the remaster as of the October 15, 2026 console launch and the October 16, 2026 Steam release.
- Reid: 21 documented skills plus three extensions, split into Special Skills and Sacred Skills, gated by a Slash/Thrust level pair.
- Farah: 13 combat attacks on a Punch/Kick pair, three skills handed out by events, and the only extension chain that needs a specific setup mid-fight.
- Keele and Meredy: around 65 castable Craymel Artes between them, and no setup lets you use all of them at once.
- Chat and Max: six skills each, all found by location rather than earned by levelling.
Three Arte Systems, Not One
The original game never explains this and the remaster does not either, so it is worth stating plainly before the tables. Reid and Farah have physical skills tied to internal counters. Keele and Meredy have spells only, and those spells exist in pairs of Craymels. Chat and Max sit outside both systems: their skills come from scripted events, and in the original release neither could chain them the way a swordsman can.
| Character | Arte type | What gates a new arte | Combos in the original? |
|---|---|---|---|
| Reid Hershel | Skills (physical) | Slash and Thrust levels, plus usage counts | Yes: normal string, then Special Skill, then Sacred Skill |
| Farah Oersted | Skills (physical) | Punch and Kick levels, plus usage counts | Yes: string, Forward, Rising, Air, Power |
| Keele Zeibel | Craymel Artes (spells) | Craymel levels plus cage assignment | No |
| Meredy | Craymel Artes (spells) | Craymel levels plus cage assignment | No |
| Chat | Skills (physical) | Six separate world events | No |
| Max | Skills (energy) | Six separate world events | Only with the Canceller equipped |
For the two mages, the Craymel Cage guide is the page that actually matters, because a spell you have technically unlocked is unusable if its component Craymels are sitting in the wrong cages. For Reid and Farah it is the reverse: nothing in a menu tells you how far along a level pair you are, so the practical advice is to keep attacking with both a Slash-type and a Thrust-type move rather than spamming one button.
Original-release source: the skill tables below come from the Tales of Destiny II Skills listing and the Craymel Artes listing at the RPGClassics shrine. Both pages catalogue the 2000 PlayStation release, and both file the game under its old North American title, Tales of Destiny II.
Reid Hershel: Slash and Thrust Levels
Reid's list is the most developed in the game. Special Skills need a Slash level and a Thrust level, and the harder ones also need you to have used an earlier skill a set number of times. Sacred Skills are gated by usage counts too, with one exception at the bottom of the table: Omega Seal lists no prerequisite beyond the 30/30 level pair, which is why it is the only Sacred Skill an over-levelled player can pick up without grinding.
| Special Skill | TP | Slash / Thrust | Also requires | Element |
|---|---|---|---|---|
| Sonic Blade | 4 | 2 / 1 | ||
| Thunder Blade | 4 | 1 / 2 | ||
| Swarm | 7 | 2 / 5 | ||
| Demon Hammer | 6 | 5 / 2 | ||
| Spiral Attack | 10 | 9 / 16 | Light | |
| Tempest Strike | 9 | 16 / 8 | Wind | |
| Twin Sonic Blade | 8 | 10 / 3 | Sonic Blade used 50 times | |
| Super Lightning Blade | 8 | 4 / 10 | Thunder Blade used 50 times | Wind, Volt |
| Neo Swarm | 12 | 4 / 13 | Swarm used 150 times | |
| Demon Twist | 10 | 13 / 4 | Demon Hammer used 150 times | |
| Double Spiral Attack | 14 | 5 / 22 | Spiral Attack used 150 times | |
| Omega Tempest Strike | 14 | 23 / 4 | Tempest Strike used 150 times | Wind |
| Sacred Skill | TP | Slash / Thrust | Also requires | Element |
|---|---|---|---|---|
| Demon Lightning Hammer | 10 | 7 / 5 | Demon Hammer and Thunder Blade, 50 each | |
| Neosonic Swarm | 10 | 5 / 7 | Sonic Blade and Swarm, 50 each | |
| Mega Sonic Thrust | 15 | 1 / 14 | Thunder Blade and Swarm, 70 each | |
| Sonic Chaos | 15 | 13 / 1 | Sonic Blade and Twin Sonic Blade, 60 each | |
| Demon Spiral Hammer | 20 | 19 / 14 | Spiral Attack 80, Demon Hammer 120 | Light |
| Neo Tempest Swarm | 24 | 19 / 14 | Neo Swarm 120, Tempest Strike 80 | |
| Omega Demon Chaos | 40 | 24 / 20 | Demon Hammer 250, Demon Twist 200 | |
| Rising Phoenix | 40 | 22 / 24 | Super Lightning Blade 200, Mega Sonic Thrust 150 | Fire |
| Omega Seal | 40 | 30 / 30 | none |
Reid's three extensions layer a second input on top of a Sacred Skill: Dragon Demon Chaos (10 TP) adds slashes to Omega Demon Chaos, Burning Phoenix (50 TP) upgrades Rising Phoenix, and Quasi Seal (24 TP) escalates Omega Seal. His documented combo goes normal string into a Special Skill into a Sacred Skill, and stops there, because the original rules do not allow any further link after a Sacred Skill. A concrete example from the old guides is Slash, Slash, Stab, Swarm, Sonic Chaos. If you want those usage counters to tick up quickly, the levelling and farming guide covers where the enemy density makes the grinding tolerable.
Farah Oersted: Punch and Kick
Farah runs on Punch and Kick instead of Slash and Thrust, and her chain is one step longer than Reid's. She has no Sacred Skills at all, so her damage route is string, Forward Skill, Rising Skill, Air Skill, Power Skill, which is why her best attacks read as a sequence rather than a finisher.
| Attack | TP | Punch / Kick | Also requires | Element |
|---|---|---|---|---|
| Palm Strike | 4 | 2 / 1 | ||
| Triple Blossom | 6 | 1 / 2 | ||
| Sonic Fist | 8 | 5 / 2 | ||
| Swallow Dance | 7 | 4 / 5 | ||
| Eagle Dive | 8 | 4 / 8 | ||
| Rising Dragon Strike | 12 | 8 / 4 | Sonic Fist 30, Palm Strike 10 | |
| Death Blossom | 12 | 11 / 12 | Triple Blossom 80, Eagle Dive 30 | |
| Twin Palm Strike | 12 | 10 / 8 | Palm Strike 60, Rising Dragon Strike 30 | |
| Mirage | 10 | 15 / 15 | ||
| Super Sonic Fist | 18 | 18 / 6 | Sonic Fist 150 | |
| Super Swallow Dance | 13 | 9 / 18 | Swallow Dance 150 | |
| Eagle Rise | 20 | 22 / 25 | Death Blossom 160, Super Swallow Dance 100 | |
| Chi | 20 | 22 / 14 | Super Sonic Fist 160, Twin Palm Strike 100 | Fire (marked with a question mark in the original table) |
Three of her skills ignore levelling entirely and are handed out by events instead, which is exactly the kind of content the remaster now points at:
| Event skill | TP | Effect | Where the original triggers it |
|---|---|---|---|
| Healer | 12 | Restores half an ally's HP | Regulus Dojo, when you leave for River Pier again |
| Detoxify | 4 | Cures Poison | Morle, when you leave for Undine Stream |
| Life | 50 | Revives a fallen ally | Farlos Sanctuary, before climbing Mt. Farlos |
Her extensions are Maximum Burst (50 TP, after 300 uses of Chi and 30 uses of Fatal Fury), Fatal Fury (60 TP, after 250 uses of Chi), and Flame Dance, which has no TP listed and is triggered by running to the target while the screen is still black after Fatal Fury, landing two punches, then chaining a rising skill into a diving skill. One warning about the source table: the original prerequisite line for Fatal Fury names an additional skill that appears nowhere else in its own list, so treat that single line as unreliable and the usage count as the real gate.
Keele and Meredy: What the Craymel Cage Lets You Cast
This is the part of Eternia's arte system that has no equivalent in most Tales games, and the part most likely to confuse a returning player. Both mages draw from the same pool of spells, but each spell needs two Greater Craymels. To actually cast it you must place the two component Craymels in different Craymel Cages and then Fringe them. The original guide's arte tables are organised under ten headings, matching ten Greater Craymels: Undine (water), Sylph (wind), Efreet (fire), Gnome (earth), Celsius (ice), Volt (volt), Shadow (shadow), Rem (light), Maxwell (elemental), and Sekundes (time).
| Arte | Element | TP | Fringe requirement |
|---|---|---|---|
| Aqua Edge | Water | 4 | Keele's starting arte |
| Spread | Water | 9 | Undine 1 |
| Acid Rain | Water | 10 | Undine 12, Gnome 5 |
| Heal | Water | 16 | Undine 1, Sylph 1 |
| Nurse | Water | 42 | Undine 14, Celsius 1 |
| Cure | Water | 32 | Undine 22, Maxwell 1 |
| Restore | Water | 60 | Undine 25, Rem 1 |
| Resurrection | Water | 96 | Undine 25, Sekundes 1 |
| Undine | Water | 20 | Summon: Undine at maximum Vitality |
| Wind Blade | Wind | 7 | Keele's starting arte |
| Air Thrust | Wind | 12 | Sylph 1 |
| Cyclone | Wind | 44 | Sylph 20, Shadow 9 |
| Concentrate | Wind | 6 | Sylph 6, Efreet 5 |
| Item+ | Wind | - | Sylph 23, Maxwell 10 |
| Medical+ | Wind | - | Sylph 26, Rem 10 |
| Sylph | Wind | 26 | Summon: Sylph at maximum Vitality |
| Fireball | Fire | 7 | Keele's starting arte |
| Eruption | Fire | 18 | Efreet 1 |
| Flame Wall | Fire | 12 | Efreet 12, Gnome 9 |
| Explode | Fire | 36 | Efreet 15, Volt 9 |
| Sharpness | Fire | 6 | Efreet 5, Sylph 7 |
| Efreet | Fire | 33 | Summon: Efreet at maximum Vitality |
| Grave | Earth | 7 | Meredy's starting arte |
| Stalagmite | Earth | 18 | Gnome 1 |
| Ground Dasher | Earth | 48 | Gnome 21, Shadow 10 |
| Mental Charge | Earth | - | Gnome 5, Sylph 11 |
| Life Rescue | Earth | - | Gnome 24, Rem 10 |
| Mental Supply | Earth | - | Gnome 25, Maxwell 20 |
| Gnome | Earth | 40 | Summon: Gnome at maximum Vitality |
| Ice Needles | Ice | 6 | Meredy's starting arte |
| Freeze Lancer | Ice | 21 | Celsius 1 |
| Blizzard | Ice | 20 | Celsius 12, Sylph 16 |
| Absolute | Ice | 30 | Celsius 14, Volt 12 |
| Resist | Ice | 6 | Celsius 10, Gnome 11 |
| Freeze Guard | Ice | - | Celsius 10, Efreet 14 |
| Celsius | Ice | 46 | Summon: Celsius at maximum Vitality |
| Lightning | Volt | 7 | Meredy's starting arte |
| Thunder Blade | Volt | 24 | Volt 1 |
| Indignation | Volt | 52 | Volt 22, Rem 10 |
| Recover | Volt | 10 | Volt 6, Gnome 11 |
| Charge | Volt | 100 | Volt 5, Sylph 15 |
| Stun Guard | Volt | - | Volt 10, Undine 19 |
| Volt | Volt | 53 | Summon: Volt at maximum Vitality |
| Dark Force | Shadow | 32 | Shadow 1 |
| Bloody Howl | Shadow | 72 | Shadow 28, Sekundes 18 |
| Deep Mist | Shadow | 6 | Shadow 9, Undine 19 |
| Barrier | Shadow | 6 | Shadow 5, Volt 15 |
| Shadow | Shadow | 60 | Summon: Shadow at maximum Vitality |
| Ray | Light | 30 | Rem 1 |
| Holy Lance | Light | 52 | Rem 21, Maxwell 24 |
| Holy Bliss | Light | 8 | Rem 15, Efreet 24 |
| Health | Light | - | Rem 10, Shadow 21 |
| Rem | Light | 60 | Summon: Rem at maximum Vitality |
| Meteor Swarm | Elemental | 60 | Maxwell 1 |
| Shooting Star | Elemental | 80 | Maxwell 26, Sekundes 26 |
| Poison Guard | Elemental | - | Maxwell 10, Shadow 17 |
| Life Up | Elemental | - | Maxwell 10, Celsius 22 |
| Maxwell | Elemental | 66 | Summon: Maxwell at maximum Vitality |
| Distortion | Time | 64 | Sekundes 1 |
| Stagnation | Time | 16 | Sekundes 2, Celsius 30 |
| Delay | Time | 60 | Sekundes 20, Gnome 30 |
| Drain Guard | Time | - | Sekundes 10, Rem 11 |
| Mental Up | Time | - | Sekundes 10, Efreet 24 |
| Sekundes | Time | 100 | Summon: Sekundes at maximum Vitality |
Three rules from the original system decide whether that table is usable in practice. Vitality runs from 1 to 10 and rises when you cast spells of that Craymel's element, falls when you cast the opposing element, and opposing pairs are Water and Volt, Wind and Earth, Fire and Ice, Light and Shadow, and Elemental and Time. Only one Greater Craymel can sit at maximum Vitality, and casting the same element again instantly drops it to 5. Casting a spell whose two components are in the same cage does nothing at all. Because the pairs overlap heavily, the original guide states outright that no combination lets you use every spell at once, so a mage's value is a matter of which five or six spells you decide you want.
Because Vitality rises with same-element casting and falls with the opposing element, a mage who spams one element will constantly break the fringe pairs that need that Craymel. If you rely on Absolute, watch Undine's Vitality, since Water is Volt's opposite.
There is no official remaster Craymel list. The names and numbers above come from the PlayStation-era arte tables for this game's original release, and Bandai Namco has not published an updated one.
Chat and Max: Skills Found, Not Levelled
Neither character has a level counter. Every skill is attached to a place, which makes them the pair that benefits most from the remaster's blue destination icon.
| Chat's skill | TP | Effect | Where |
|---|---|---|---|
| Pow Hammer | 12 | Throws hammers that stun | Starting skill |
| Rover Tool | 15 | Steals an item on impact | Starting skill |
| Toss Hammer | 16 | Poison hammers | Small moon-shaped island far south-west of Tinnsia (coordinates 183, 130) |
| Ice Hammer | 20 | Freezing hammers | Inferia, the underwater cave (coordinates 121, 122) |
| Para Ball | 16 | Chance of an instant KO | Bathe at the Craymel Hot Springs |
| Eternal Hammer | 60 | Massive damage | Aifread's Cavern |
| Max's skill | TP | Element | Where |
|---|---|---|---|
| Burning Force | 20 | Fire | Starting skill |
| Air Blade | 24 | Air | Peruti, the docks |
| Aqua Spiral | 28 | Water | Tinnsia |
| Rage Laser | 34 | Light | Outside Cape Fortress |
| Dark Laser | 40 | Shadow | The ruined house in Luishka |
| Elemental Master | 72 | All elements | After learning the other five |
The coordinates are the original game's on-screen map readouts, and they are the only thing resembling a location marker the old tables give you.
Combo Routing by Character
Chaining rules in the original release are character-specific rather than universal, and the remaster's own materials describe combat only in general terms, so these categories are the ones to work with.
Original-release source: the combo orders, button assignments and casting rules in this section are documented on the shrine's Game Mechanics page, which also states plainly that no Craymel setup lets you use every spell at once.
| Chain | Order | Notes |
|---|---|---|
| Reid | Normal string, Special Skill, Sacred Skill | Nothing links after a Sacred Skill |
| Farah | Normal string, Forward, Rising, Air, Power | No Sacred Skills exist for her |
| Max | Attack skill, attack skill, Elemental Master | Requires the Canceller equipped |
| Chat | Single skills only | The original rules give her no chain |
| Keele, Meredy | Spell casting only | Casting is interruptible; being hit cancels the spell entirely |
Two mechanics deserve more attention than they usually get. First, skills are assigned to a small set of button slots, so you cannot carry every arte into a fight even after unlocking them: the original layout puts the primary character's skills on the attack button plus Up, Down and Left/Right variants, and a single shoulder slot can hold a party member's own skill. Second, Keele can shorten a spell's casting time by pressing the direction prompts that appear next to his HP and TP, and Max has the same option for his skills. That casting window is also the weakness of the whole spell system: any hit taken while charging ends the spell, and it has to be started again from scratch.
On the remaster side, do not expect the original's button notations to match your controller. The change list puts Button Settings under Menu > Custom, and it covers battles as well as fields, towns and dungeons.
Combination Attacks
Four pairs exist in the original release, each one a physical skill from Reid or Farah chained into a spell from Keele or Meredy. Because the mage half is always a fringed spell, whether you can fire the pair at all depends on your cage setup, which is the clearest argument for deciding your mage's spell list before a boss fight rather than during one.
| Combination | Characters | Trigger pair | Result |
|---|---|---|---|
| Flaming Sword | Reid and Keele | Demon Hammer plus Fireball | Fire-element Demon Hammer-style attack |
| Serpent Knuckle | Farah and Keele or Meredy | Rising Dragon Strike plus Heal | Poisonous strikes with Farah |
| Lightning Strike | Farah and Keele or Meredy | Twin Palm Strike plus Lightning Blade | Lightning-element attack |
| Earth Divide | Reid and Keele or Meredy | Spiral Attack plus Cyclone | Wind-element spinning sword attack |
Earth Divide is a naming oddity in the original tables: it pairs a wind spell and is described as a wind-element effect, so do not read the name as telling you what it does.
Mystic Artes: What the Term Means Here
Mystic Arte is the term the remaster's own materials use, and the one place they use it is the Battle Subtitles setting, which covers the victory voice and the Mystic Arte voice lines that play on the post-battle results screen. That confirms the game labels voiced arte lines that way and nothing more, which is the honest limit of what official material says. No official remaster list of Mystic Artes per character has been published, and the original-era tables do not sort their content under that label either. What they do document is the finisher tier: the summon extensions, which are triggered by holding a button through the previous animation. For Maxwell the chain runs Dual Sol, Eternity Swarm, Prismic Stars, Shining Gate, Explosion Nova, Maxwell Minimus, Dimension Material, and finally Blue Earth, which restores all HP and TP and adds bonus experience at the end of the battle. The button names in that chain are the original controller's.
Official source: Remastered change list (Bandai Namco official site)
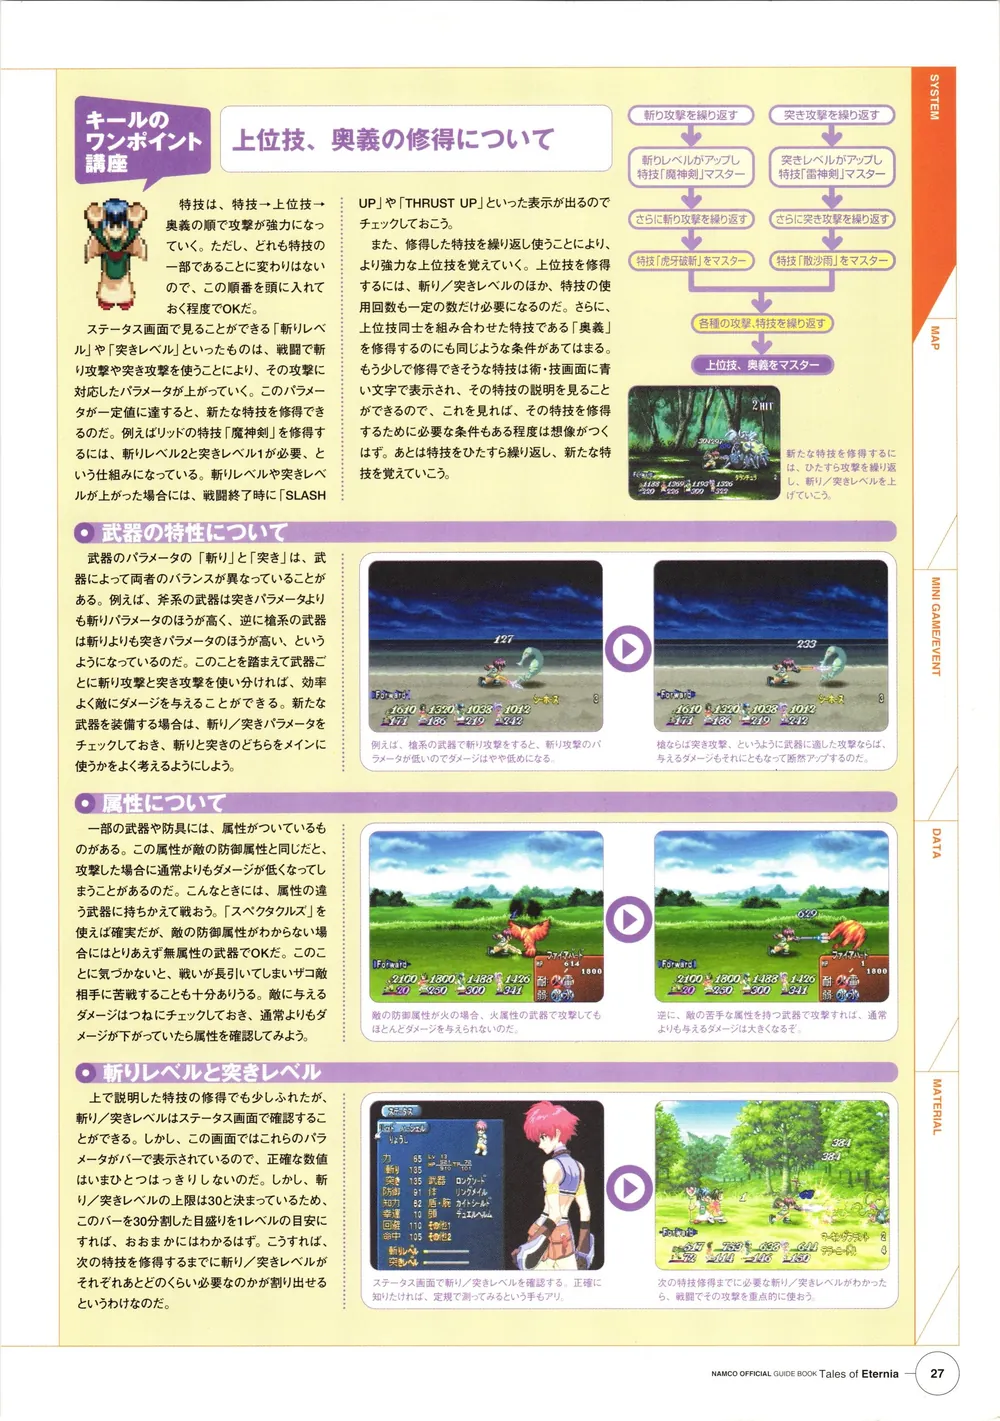
The scan above is from the printed PlayStation-era guide, which is the kind of original documentation that treated arte upgrades as a topic of its own rather than a stat table. It is here as period reference, not as a remaster source: every number in the tables on this page comes from the PlayStation-era listings cited next to them. One arte sits outside every category those listings document, and it is Meredy's alone. Destiny costs 133 TP, needs a specific item the old table abbreviates as S.D., and can only be used once every 30 minutes of play. That condition is a PlayStation-era measurement, not a remaster one.
What Remastered Changes About Artes
The official change list is unusually specific about artes-adjacent systems, and none of the entries is a damage rebalance. The wording in the third column is the launch-week English rendering of that Japanese page, so treat the phrasing as a translation and the behaviour as the fact.
| Change | What it does | Wording in the change list |
|---|---|---|
| Blue exclamation icon | Marks events related to learning new techniques and skills | A blue exclamation mark will be displayed for events related to learning new techniques and skills |
| Green text highlight | Newly learned techniques and skills are shown in green | Newly learned techniques and skills will be displayed in green text |
| Battle Subtitles | Subtitle toggle covering victory and Mystic Arte voice lines | You can toggle them ON/OFF from Menu > Custom > Battle Subtitles |
| Button Settings | Remaps battle, field, town and dungeon controls | Added key customization functionality for fields, towns, and dungeons |
| Combat Level | Mania selectable from the first playthrough, Unknown from the second | The Mania combat level is available from the start of the first playthrough |
Official source: Tales of Eternia Remastered on Steam
Nothing in the official material says arte TP costs, damage values or unlock thresholds were adjusted, and no arte table has been published for this release. Press coverage describes the remaster as based on the PSP port rather than the 2000 PlayStation original, and the documented PSP changes were presentational: faster loading with the loading screens removed, cropped field graphics, battles redone in full widescreen, and a better overworld frame rate, as recorded on the Wikipedia entry for the original game. The working assumption, then, is that the arte roster matches the original lists on this page, but that is an inference from how the PSP version was described, not a remaster measurement.
Every TP cost, level pair and usage counter here is original-release data. If the remaster quietly altered a threshold, the tables above will be wrong in a way nobody has documented yet. Where a value matters for a build decision, check it against your own in-game skill list first.
FAQ
Does every character have artes in Tales of Eternia Remastered? Yes, but through three different systems. Reid and Farah unlock skills from hidden Slash/Thrust and Punch/Kick levels plus usage counters. Keele and Meredy cast Craymel Artes decided by Craymel levels and cage assignment. Chat and Max learn six skills each by triggering events in specific places.
Can Keele and Meredy use every spell at once? No. Every spell needs two Greater Craymels placed in different cages, and because the pairs overlap, the original guide states there is no combination that lets you use all spells simultaneously. You choose a setup that covers the spells you actually want.
Why do Max and Chat not have combos? The original rules only give chain sequences to Reid and Farah. Chat has no chain at all, and Max can only link his skills together while the Canceller is equipped, which is why his skill order is a build decision rather than a default.
Did the remaster change arte damage or TP costs? No official change list entry mentions arte rebalancing, and no remaster arte table has been published. The confirmed arte-related additions are the blue destination icon for arte-teaching events, green highlighting on newly learned artes, and subtitles for Mystic Arte voice lines.
How do I find the events that teach new skills? Use the blue exclamation icon. The official change list says it marks events related to learning new techniques and skills and that it also displays the distance to the destination, which covers Farah's event skills and everything on Chat's and Max's lists.
What is a Mystic Arte in this game? The term appears in the remaster's official change list, in the battle subtitles entry covering victory and Mystic Arte voice lines. The finisher-tier content documented in the original tables is the summon extensions, including Maxwell's eight-step chain ending in Blue Earth, plus Meredy's Destiny.
Related Guides
- Tales of Eternia Craymel Cage and Greater Craymels - the assignment system that decides which of the spells above a mage can actually cast.
- Tales of Eternia Remastered Battle System Guide - how Boost, Battle Retry and Quick Recovery sit around the arte system.
- Tales of Eternia Characters: All Playable Party - the six characters and what each one is for.
- Tales of Eternia Best Party Setup and Team Builds - which four to field once you know each arte family.
- Tales of Eternia Leveling and Gald Farming Guide - where to grind the usage counters that gate Reid's and Farah's late skills.
- Tales of Eternia Best Weapons and Equipment - the accessories that change how skills behave, including the Canceller.
More Tales of Eternia Remastered Guides
How the combat levels work in Tales of Eternia Remastered: what is selectable from hour one, what unlocks on a second playthrough, and where to change it.
Reid's Eternal Sword, Farah's Omni Weapon and the six-piece legendary set behind Legendary Arsenal, plus armour, accessories and Gald priorities.
The Glimmer Spire floor by floor, the solo Valkyrie fight on the top level, and how the remaster opens Nereid's Labyrinth on a first playthrough.
Optional and EX bosses in Tales of Eternia explained and separated: Sekundes, Wraith Horus and Valkyrie, where each one lives and what each rewards.
HowLongToBeat has no remaster times yet; the 2000 original averages 33 hours for the story, 42 with sides and 73.5 hours for full completion.
Tales of Eternia Remastered holds a 76 Metascore: what reviewers praise, the 2D combat split, the Switch stick problem, and who should buy at $29.99.
Tales of Eternia leveling and Gald farming: Boost's experience and encounter dials, when grinding pays, and the mid-game buys worth saving for.
Every Tales of Eternia minigame and where to find it: the Rasheans river race, Craymel Ball, Chamballoon, the stone game and the cooking contest.